Last week I told you about why you should use an isolation coat on your acrylic paintings and how to go about applying one. This week I want to tell you about varnishing your artwork. I will try to address some of the confusion that seems to surround varnishing your work but please feel free to contact me if you need more information. 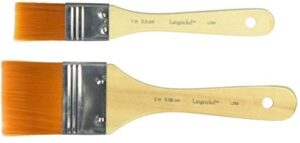
First let me say that if you are an oil painter you do not add an acrylic isolation coat over your oil painting. Acrylic paints and varnishes are removable but the cleaning chemicals will also dissolve the paint, so it is essential that you use an isolation coat over acrylic paint and under the varnish layer. With oil painting the varnish used has a completely different composition to the paint.
With oil painting the care comes into play when varnishing the finished piece. It MUST be dry. If you try and varnish a wet oil painting, you could easily finish up with a huge mess as the varnish can activate the wet paint and move it around your canvas. Drying times for oil paintings vary depending on where you live in the world, levels of heat and humidity and the amount of paint used on the canvas.
There are artists who do not varnish their work but let’s start with why you really should. Varnish provides a protective layer, which is removable for conservation purposes. Dirt will gather on the varnish but cannot embed itself into the paint layer. If your painting yellows or looks dirty, the varnish, along with all the dirt, can be removed and a new layer of varnish applied, which should protect your artwork for a very long time.

Whilst many modern-day painters are not concerned with the longevity of their work, I would argue that you should always treat your work as precious. You may not live to see it reach its potential but the owners of your work or their families will. Not preparing it properly just isn’t fair to them so treat all your work as worthwhile, regardless of where you are on your art journey. Get into the practice of doing this so that you are an expert when you get to the point where you are producing your best work.
NB there are non-removeable varnishes on the market which will give you a nice finish without going through isolation coats and varnishing but using a removable varnish is best practice really to ensure the preservation of your work. However, it is a personal choice at the end of the day.
A varnish final layer also adds depth to the colour of your acrylic painting. Acrylic paint becomes dull and a bit lifeless when dry. Using a varnish will invigorate the colours and really make them sing. Also, if you are using different finishes in your work, such as an acrylic medium or gel, they will give a different final look. Last but not least your paints can and will dry with a different look, depending on how much water is used in their application, which medium you have mixed with your paint and even mixing paints together from different brands.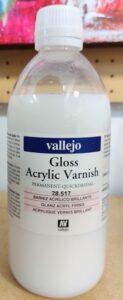
Varnishing your finished piece will give a uniformity to your work, evening out these differences. However, you still need to use an isolation coat before your varnish, and this must be done using a gloss medium, or you can now buy isolation ready-made. When this isolation coat is dry you then add your varnish, which can be matt, satin or gloss, depending on how you want the finished piece to look.
Personally, I love a glossy, shiny finish. I know there are many who feel that a high gloss finish can cause glare on a painting when lit by bright lights, but I still like it. I also like using gold in my work, as you will know if you read my recent piece on gold leaf or gilding a few weeks ago. Gold leaf must be protected with a varnish layer and using gloss keeps the shine I want from it. Using 24 carat gold means that I don’t need to use a varnish protector, so I may experiment with a matt varnish and then add the 24 carat gold over that to give a different final look.
Regardless, having applied two coats of isolation and allowed them to fully dry between applications, I then will add three or four coats of varnish to the work which I apply with a soft brush to avoid leaving brush marks. Next you need to consider which type of varnish you are going to use. There are two main types to choose from, water- or solvent-based.
The water-based varnishes are normally created using an acrylic polymer, similar to acrylic paint. They are also similar to acrylic glazing formulae.
These water-based varnishes are milky in appearance when applied but dry clear. They are ideal for smaller works as they are easy to clean up and tend not to be smelly, but they can be difficult to use on larger works unless you are able to work very quickly.
Some water-based varnishes need to be watered down before using them. I use a couple of different varnishes, one of which must be watered down, which is why I tend to apply three or four coats. The label tells you to use three parts varnish to one of distilled water. I use filtered water which I then boil and allow to cool. It has always worked well for me, but I suggest you find out what works best for you.
If you are struggling to work quickly with a brush, you can use a large clean sponge but do be careful as you can get bubbles sitting in the finished varnish if you move it about too much. Water-based varnishes are not as hard as solvent-based varnishes. Again, it is personal choice about the finish you are after.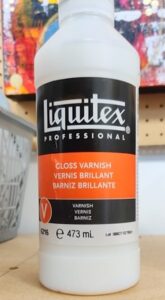
If you go down the solvent-based (also called Mineral Spirit Acrylic or MSA) route you will get a tough but still flexible layer of varnish on your work. MSAs are clear when applied and have a self-levelling quality and are easier to apply. The clarity is slightly superior to water-based varnishes, which as I said before do dry clear, though MSAs are even clearer. The biggest issue with these varnishes is that they must be thinned using full strength spirits, which are smelly and messy to clean up.
It is possible to varnish acrylic painting using oil painting varnishes. It is best to read the manufacturer’s instructions but you might find them easier to use then MSAs as you can use them straight from the pot.
There is always the option of using spray varnish. I have used this when making works containing lots of texture. Unless you are really careful, painted on varnish can build up against the ridges of the textured paint. Spray reduces this build up but I would recommend painting on the varnish if you can to give you a better overall application and protection.
If you have any advice or tips you would like to share with me and my readers, I know that they would be really grateful to hear from you.
NB Just for the record, I do not get paid to endorse any of the brands I have mentioned above.
If you have enjoyed reading this post, please like and follow me and please share it with people who you think might be interested. I am always on the lookout for new artists to feature as I know how much everyone enjoys reading about other artists. Also, if you think there is a subject you would like to know more about and would like me to write about, I will be happy to consider it. Sharing, liking and following my blogs increases the number of people the algorithm shows the blogs to, so please share. Thank you in advance for supporting me this way.