About the Drypoint etching course I took with Mai Osawa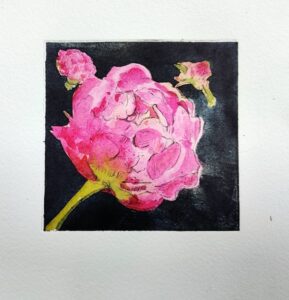
Just last weekend, having finally got over the first cold I have had in four years, I attended a two-day course with the lovely Mai, who lives just six whole minutes’ drive away from me.
Mai is not only the most delightful person to be around but she is also a fantastic print maker. Despite having known her for about ten years now, I don’t know a lot about her personal life as she is a very private individual. I have done a few classes with her over the ten years and plan to do more in the future, but I signed up for this course simply because I took a drypoint etching course many years ago and loved it. The opportunity to explore this etching medium has not come around again until now so I jumped at it.
Firstly the difference between drypoint and copper plate etching becomes very clear if you look at the marks made on the plate using a magnifying glass. With drypoint the marks are softer with fuzzy edges. This is because the marks are made by moving or removing the plastic with different types of needles. Etched lines on metal plates are crisp because it is the wax covering being removed rather than the metal. This is removed by the chemicals which the plate is dipped into even though the same types of etching needles are used in both methods.
In the first class I took on drypoint etching, I was taught using a plastic plate much thicker than the ones on this course. I did a lot of the work onto that etching plate by removing the plastic in a similar way to how you remove lino from lino sheets. With Mia we used very thin sheets of plastic and scratched the images into the plastic, rather than gouging anything out.
There are always so many different ways to achieve a particular look or result and seeing how someone else does this is fascinating. As is often the case when I do any printmaking, I went for a more realistic subject and this time used photos of flowers which had been given to me at some point over the years. I have hundreds of photos of flowers, fish, seed pods, seaside cottages, fish and people in national costumes. These are all subject areas I am interested in, along with my abstract circle works.
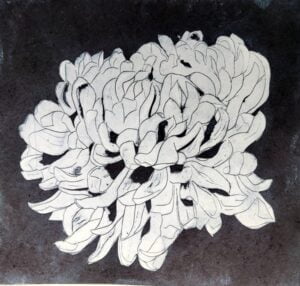
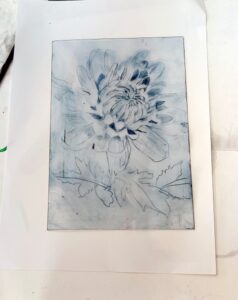
So in preparation for the class I picked out four interesting flower photos which I printed out in colour. I then turned the photos into black and white line drawings, with a little bit of shading, just so that I could add interest to the final image.
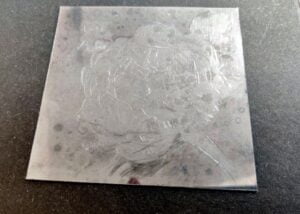
Drypoint etching gives you all the beauty of etching without the chemicals required to dissolve the metal plates. With drypoint you use plastic sheets which are delivered with a frosted thin plastic film covering one side and a clear plastic film cover on the other. Both these pieces of film need to be removed before printing but initially only the side you will be working on needs to be removed for you to work on it.
Various scratching and scraping tools are used on the plastic to make marks which when inked up will release the ink to make the print.
So, having decided on your image you need to consider how much ink you want to describe your image. Some people want large areas of dark or black to describe the image. Others want a more linear effect. I took a linear approach as I knew that I wanted to hand colour the prints once they had dried.
Also, when producing a drypoint print, just like the majority of printing methods, you need to remember that what you scratch or mark into the surface of your printing plate, when inked up and run through the printing press, will appear back to front. So if you want to use lettering you need to flip it first. The same is true if you want to use a particular scene, say for example the London skyline. It needs to be created back to front in order that it will be the right way when printed.
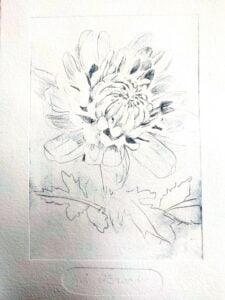
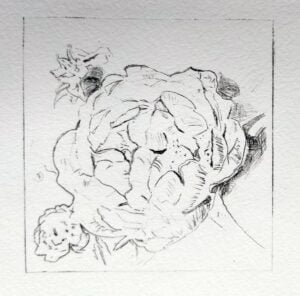
As I was using flowers for my prints, it really didn’t matter which way round they finished up. With my prints I used different tools to make the marks in the plastic; some very light marks and others deeper. I used a cross hatching method in some areas to increase the density of the ink but lots of light areas were left for me to paint.
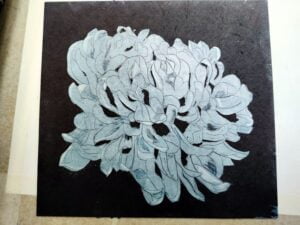
These plastic plates do need to be handled with care as they are more fragile than other print plates and vigorous rubbing is not recommended. The lines or burrs (the raised edges or little pieces of material that remain attached to a work) made in the plate need a light touch. Ink is gently applied all over the plate and then rubbed into the lines and carefully removed using initially a cloth called tarlatan and then with small sheets of tissue paper. Traditionally, old telephone books or the Yellow Pages were used for this purpose, but getting your hands on these in the 21st century is a bit like looking for hens teeth. If you are heavy handed in this the lines can close up but also you can remove too much ink so that your print image will not be successful.
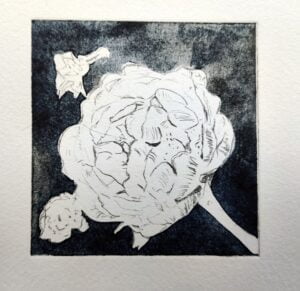
Once the desired amount of ink has been added/removed from the plate, it is then run through an etching press using printmaker paper which has been dampened. Why? Because dry paper does not get pushed into the lines when you run it through the press. You need the paper to be damp so that it pushes easily into the marks to pick up the ink.
Historically, drypoint appears to have been invented by a 15th century German artist but this method was also regularly employed by Rembrandt and often in combination with etching and engraving.
Today however this method is used to make prints using many different colours sometimes on one plate, other times using multiple plates and also using a method called Chine Collé, where you add tissue paper which glues to the print when putting it through the press. It can be very effective.
In this instance I have decided to hand colour my prints using special metal-based watercolour paints as they are intended to be a gift for my beautiful sister on her birthday. I will share on Instagram the piece/s she wants to keep.
If you have enjoyed reading this post, please like and follow me and share it with people who you think might be interested. I am always looking for new artists to feature and if there is a subject you would like me to write about, I will be happy to consider it. Sharing liking and following my blogs increases the number of people the algorithm shows them to. Thank you in advance for supporting me this way.