If you are an acrylic painter, hopefully you are aware that it is necessary to apply an isolation coat to your artwork before you apply the varnish. If you are new to acrylic painting and have never heard of this, you are forgiven but you need to know this.
An isolation coat is painted onto your finished artwork before you apply the varnish. Why? Because varnish will simply stick to your painting and if you need to remove it for cleaning your artwork will be damaged. This is important as varnish is not permanent. It is applied to protect your work from dust and pollutants, and you are advised to remove and replace the varnish every five to ten years. Personally, I haven’t needed to do that with any of my works, but I do live in a fairly clean part of the countryside, not in a city with all the vehicle fumes etc. which could damage works. However, if my artwork is sold, it could easily finish up in an area where there are such pollutants, so it needs to be protected just in case. Anyway, it is simply best practice.
Before you start you need to do two things. First you need to photograph your work. You will get a better photograph if you take it before adding the isolation coat, which is shiny. The second thing is that you must be certain your artwork is dry. If you only use thin layers of paint, you can get away with only leaving it for two-four days but if you are heavy handed, it can take up to a fortnight (that’s two weeks for my US readers) for the paint to fully cure/dry. It does depend on the weather conditions and the levels of humidity where you live. If you have a cold studio in wintertime the paint will take longer to dry. If you are not sure, just wait. You can completely destroy a piece by doing this too soon.
These days you can buy pre-made isolation coat, but I am a bit old school and prefer to make it myself. Don’t panic. This is not difficult to do.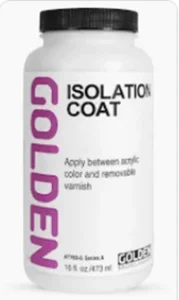
Hopefully, regular readers will have seen the disclaimer at the bottom of many of my blogs (including this one) but I will mention it here now. I do not receive any reward, financial or otherwise, for mentioning the products I use. I am sure there are other similar products which people are very happy with, but I have stuck to using these for a long time now so that I don’t have to think about this stage as it is already firmly locked into my little grey cells. Probably.
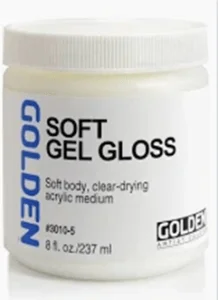
So, I use Golden products for this stage and occasionally I use their paints too, but when finishing a painting Golden is my go-to.
To make your own isolation coat I mix Golden soft gel gloss medium in a ratio of approximately two parts gel to one part water. Many manufacturers advise you to use distilled water but because I don’t have any, I simply boil a large quantity in a kettle and pour out half into a jug to cook. My reasoning is that any nasty stuff sinks to the bottom, so I am only using the top 50% of the water in the kettle. If I am deluding myself, I am sure someone will let me know.
I also have oblong containers, either spread or takeaway boxes, which allow for a wide brush to be used. Obviously, these must be really clean, so I hand wash them first and then put them through the dishwasher.
Because I tend to paint in series, usually of nine (though my latest is of 19), and I have four large canvases which also need an isolation coat, I mix up a large amount. I would always advise you to mix up more than you think you are going to need as trying to replicate the mixture if you run out is not easy unless you have weighed and measured the items to within an inch of their lives.
So, with a large spoon I will put five or six spoonfuls into the box and then start slowly adding the water once it is cold or at room temperature. Don’t worr that the mixture looks too thick and is very white. I promise you it dries clear. Honestly.
You can, and possibly should if you are using box canvases, place a coat on the edges. I do when I remember, but I sometimes forget. If you are going to be good and paint the edges it is probably best to push map pins into the back of the canvas so that there is a gap between the canvas and the surface you are using. It makes it easier to paint and also to move around without your work sticking to the surface.
The first thing I do before adding anything to my painting is to make sure the surface is clean. The last thing you want is to trap dust between the paint and the isolation coat. You will never be able to save it if this happens. I have cats, who are banned from my studio for just this reason. But also, it is just a good idea to run a clean, dry cloth over the surface before you start.
You will probably need to protect the surface you are working on, too. I buy cheap shower curtains from the supermarket (£2.00 each), to cover my tables.
You will need to use a brush which is soft, simply because hard brushes will leave marks on your work, which doesn’t look very nice. You need to work quickly. It takes a while for the isolation coat to fully dry, but parts can dry almost straight away and if you go over those areas you can pull up the isolation coat and leave marks on your work.
Golden suggest you work from one side to the other. Personally, I pour a generous amount into the centre of my piece and then move the product in a clockwise direction from the centre to the outside of the painting. You need to find what works best for you, but if I am coating a very large piece I will do as Golden suggest. I do think it is size dependant.
I also watch very carefully as I go, making sure that I am not missing areas. If you look at the work from the side, you should be able to see where the wet product is sitting and where any dry, i.e. missed, areas are. I do this as I go, it is a bit like a strange dance.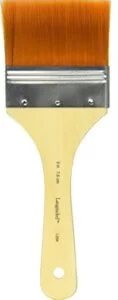
Then leave it alone to dry. If you have missed some bits, I have in the past added a second coat which has covered the missed bits and looks absolutely fine.
One final word on this. If you are not sure your work is finished you can simply leave it with the isolation coat on and paint over the top of it. The surface will feel different, smoother and slightly slippery but you can add paint easily, though you will need to add a new coat of isolation product to it before varnishing.
As for varnishing itself, I will cover that another time.
NB Just for the record, I do not get paid to endorse any of the brands I have mentioned above.
If you have enjoyed reading this post, please like and follow me and please share it with people who you think might be interested. I am always on the lookout for new artists to feature as I know how much everyone enjoys reading about other artists. Also, if you think there is a subject you would like to know more about and would like me to write about, I will be happy to consider it. Sharing, liking and following my blogs increases the number of people the algorithm shows the blogs to, so please share. Thank you in advance for supporting me this way.