Oil painting is all about, and requires, patience. Layering, waiting and building the paint up can create unparalleled depth. Master these classic methods and advanced techniques to unlock luminous, professional results.
Fat Over Lean: The Golden Rule
To prevent cracking, always layer flexible, oil-rich paint over thinner, solvent-heavy layers.
- How to Do It:
- Start with a thin underpainting (turpentine plus pigment).
- Gradually add more linseed oil in each layer.
- Finish with thick impasto strokes.
Scumbling for Softness
Drag a dry, opaque brush over dried paint to create atmospheric effects like fog or delicate skin tones.
- Best Colours: Titanium white, Naples yellow.
- Works Great Over: Dark, dried glazes for a glowing effect.
Glazing like the Old Masters
Transparent glazes (paint mixed with medium) add depth and richness.
- Pro Tip: Use a single pigment (e.g., alizarin crimson) over a dry layer to intensify shadows.
- Avoid Mud: Let each layer dry completely before adding the next.
Alla Prima (Wet-on-Wet)
For spontaneous, expressive work, blend directly on the canvas.
- Ideal For: Plein air landscapes, quick portraits.
- Challenge: Requires confident brushwork – no second-guessing!
Palette Knife Magic
Thick, textured strokes add drama to landscapes and abstracts.
Try This: Load the knife with multiple colours for dynamic, broken-colour effects.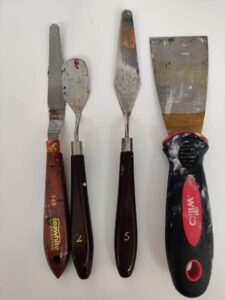
Safety Note: Use odourless solvents and always keep your workspace well-ventilated.
NB I do not get paid to endorse any people or brands mentioned in my blogs.
If you enjoyed this post, please like, share and follow me. Sharing, liking and following raises the algorithms in my favour.
Thank you for your support.